What is best? Injection moulded or handmade corners? The roofing industry is divided. Both types of corners have both advantages and disadvantages and varying degrees of difficulty when it comes to installation.
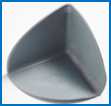
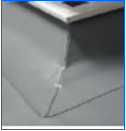
Injection Moulded Corners The preformed injection moulded corners have been available for many years. They are made from PVC compound and are usually manufactured by a Third Party Company but supplied directly by the membrane manufacturer including IKO Polymeric. They are typically 100mm x 100mm on the internal corners and 200mm x 200mm on the external corners, giving adequate coverage.
They come in two forms, rigid or semi flexible.
The thickness can vary but typically they are 1.5mm – 2.0mm thick.
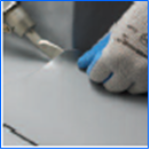
The corners are positioned, tacked into place and then a pre-weld and final weld is performed. The corners are never fully welded just to allow for any expansion or contraction within the membrane.
They are reasonably quick to install and generally speeds up the whole installation process of the upstand corner. Their main purpose however is to eliminate the risk associated with handmade corners.
The main issues with this type of corner is that they are specifically designed for 90° angles and not very forgiving if the corner is not square resulting in a poor fit and a compromised seal.
Due to the injection moulding process, the corners very rarely have the exact colour or finish as the membrane even if the same raw materials have been used.
The aesthetic appeal of the injection moulded corners is similar to Marmite; you either love them or hate them.
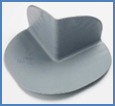
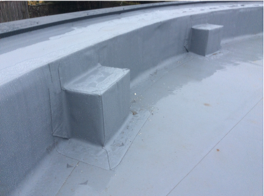
Because of the inherent problems associated with injected moulded corners (stiffness and colour), IKO Polymeric manufactures an in-house corner which uses Armourplan detailing membrane. The advantages are that the corner is flexible so can cope better with corners that are not 100% square and as they have been manufactured from membrane they achieve a colour match and are less noticeable. The inner overlap seam is high frequency welded and electronically tested.
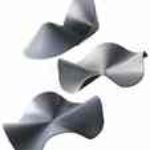
Handmade corners An installer’s first experience of forming a handmade corner is usually on the membrane manufacturer’s training course. It normally takes a number attempts and scorched fingers to form the corner correctly and achieve a water tight joint on the internal seam.
Both the internal and external corners have their challenges when you are learning how to form them.
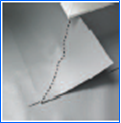
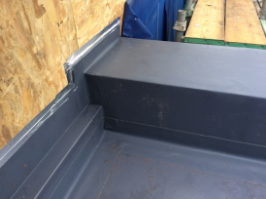
When forming an external corner, the three key techniques ensuring a successful external corner are:
The prepared external corner patch should not overlap the corner flashing any more than 20mm.
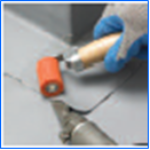
The vertical overlap should be adequately stretched and formed so as to fit the contour of the corner prior to hot air welding.
Hot air weld the vertical section of the external corner patch in two stages allowing the corner to cool down between stages.
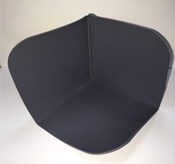
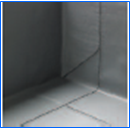
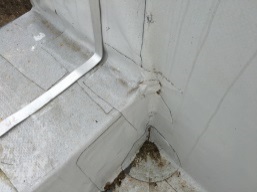
The key stages of ensuring a successful internal corner are:
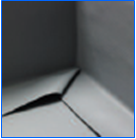
The internal corner should be formed to ensure the fold is in line with the internal corner and the point at which the horizontal laps meet.
The formed pocket should be fully welded and allowed to cool down before going onto the next stage.
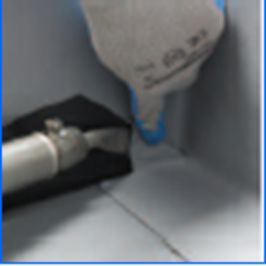
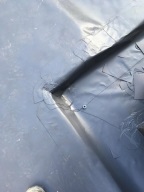
The formed pocket is then welded down to the lower section of the flashing, it is important that the fold is fully welded. Water will track along the fold if it is not fully fused. It is important to ensure sufficient heat is applied to the folds to enable it to completely fuse.
It is not imperative that the fold at the back of the corner is fully welded as this is the area that is prone to splitting when over heated and pressed. For added security, the internal corner can be formed on the horizontal surface.
It is always a good idea to practice the internal corner with a scrap of membrane which then can be put under a water test.
The handmade internal and external corners are used in the detailing of some swimming pool liners and are more than capable of remaining watertight under a head of water.
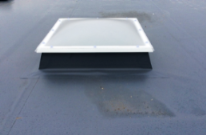
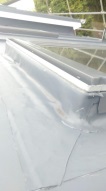
Roof light corners are always handmade due to the varying angle of the upstands.
When forming a roof light corner, the three key techniques ensuring a successful external corner are:
The prepared external corner flashing should not overlap the adjoining flashing any more than 20mm at the base of the corner.
The overlap at the base of the corner should be adequately stretched and formed so as to fit the contour of the corner prior to hot air welding.
Hot air weld the vertical section of the external corner patch in two stages, allowing the corner to cool down between stages.
Once mastered the installer is equipped with the required skills to tackle any type of corner.
Poorly installed corners are responsible for their fair share of roof leaks so it’s worth getting them right first time.